HARD SPOT INSPECTION TROLLEY - English -
Page 68/84
Operating and Maintenance Instructions
adaptaed from: https://app.box.com/s/c6qfgtuhfg1yd2ottrfum98x8jmg7rn3
| Hard spot inspection trolley • PLAMAT-M •
18201 |
|
| Operating and
Maintenance Instructions • V2.0 |
Scanning procedure
|
6 SCANNING PROCEDURE
6.1 Overview
A complete plate is scanned in terms of stripes. Each stripe consists of a short and a long run.
In order to prepare the plate for testing, the usage of a shock cord
with chalk is recommended to indicate the stripes with a width of 240
mm on the plate.
Proceed according to the followings steps:
1. Perform the short run first (Figure 63, stripe 1, from right to left)
2. Ensure the tracked distance is larger than the length of the trolley.
> When reaching the plate edge, the software indicates to swap to the long run.
3. When changing from short to long run, turned around the trolley (#3).
> Then the long run is performed (in below figure from left to right) and stripe 1 has been completed successfully.
4. Move the trolley backwards over a short distance to start with the short run for stripe 2.
5. Repeat the steps 1 to 5, but on the other side of the plate.
After having completed above procedure for the entire plate, you can
decide whether the stripes are combined in meander-like or
parallel-like pattern.
Then, a complete 2D-Scan of the plate is provided.
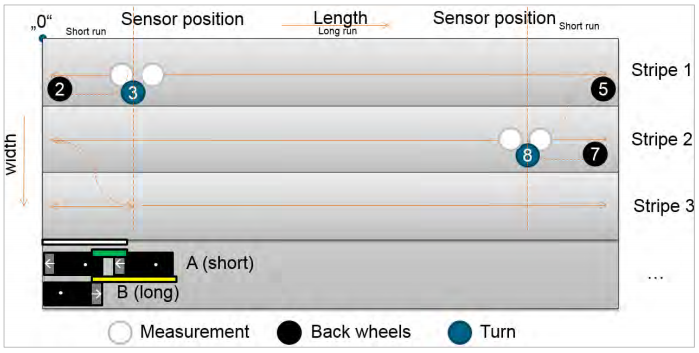
Figure 63: Overview of inspection procedure
| ROSEN and IZfP Page 68 of
84 |
Confidential! |
|