HARD SPOT INSPECTION TROLLEY - English -
Page 39/84
Operating and Maintenance Instructions
adaptaed from: https://app.box.com/s/c6qfgtuhfg1yd2ottrfum98x8jmg7rn3
| Hard spot inspection trolley • PLAMAT-M •
18201 |
|
| Operating and
Maintenance Instructions • V2.0 |
Software 3MA-X8 MMS
|
4.4 Tab: Inspection
The Inspection tab is the first panel shown per default after starting the MMS software and loading a module.
This view provides the inspection results.
4.4.1 Overview
The following two illustrations describe the elements of the Inspection tab, here without any measurement results
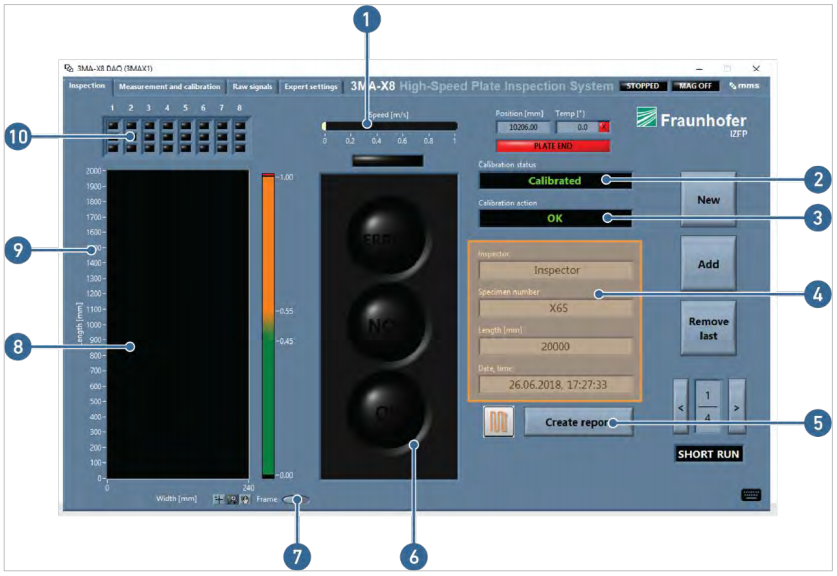
Figure 38: Overview of Inspection tab (1)
Table 10: Elements on the Inspection tab (1)
Pos.
|
Description
|
| 1
|
Speed
|
| 2
|
Calibration status
|
3
|
Calibration action
|
4
|
User and measuremente information
|
5
|
Create report
|
6
|
Measurement display
|
7
|
Frame size full/moving
|
8
|
Mapped sensor signals
Green = Ok
Orange = NOK
Red = error
Black = not tested
|
9
|
Measure distance
|
10
|
Single probe head signals
|
The user information, i.e. name of Inspector, is retrieved from the windows login information.
The specimen number can be inserted manually or via bar code reader.
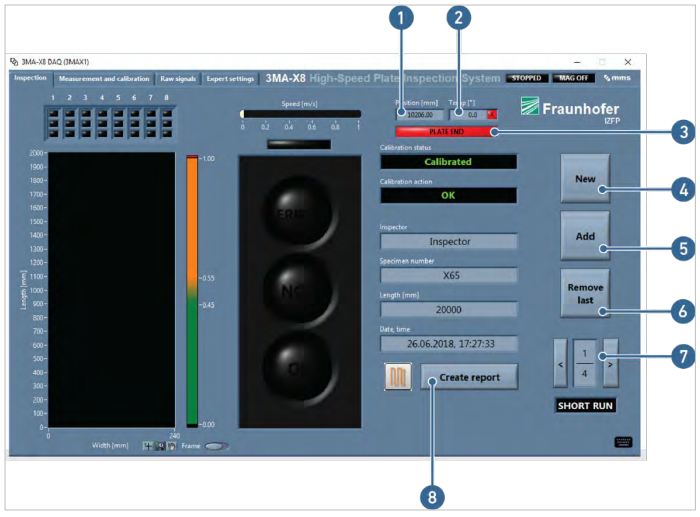 Figure 39: Overview of Inspection tab (2)
Table 11: Elements on the Inspection tab (2)
Pos.
|
Description
|
| 1
|
Actual position
|
| 2
|
Temperature
|
3
|
Plate end detection
|
4
|
New mapping trace
|
5
|
Add new mapping trace
|
6
|
Remove last mapping trace
|
7
|
Active mapping trace
|
8
|
Create report file
|
During a measurement, the Inspection tab shows a measurement carpet, where the view can be switched between static full size or moving size with the Frame button:
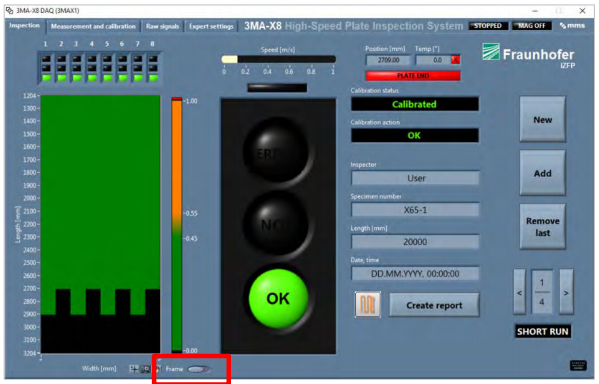
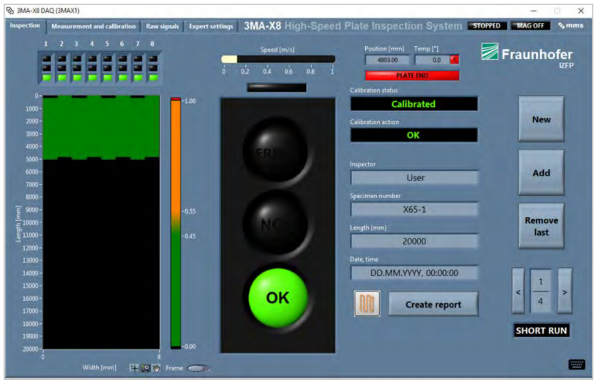 Figure 40: Influence of Frame button on measurement progress
| ROSEN and IZfP Page 39 of
84 |
Confidential! |
|